|
Introduction Pipe Chanter Reeds
- What you require
- Shaping the Chanter Reed
- Cane Gouge
- Reed Blade Former
- Reed Staple Cutter
- Chanter Reed Staple Roller
- Chanter Reed Staple Former
- Chanter Reed Assembly Jig
Drone Reeds
- What you require
- Making the Drone Reed
- Diagram Index
- Drone Reed Jig
|
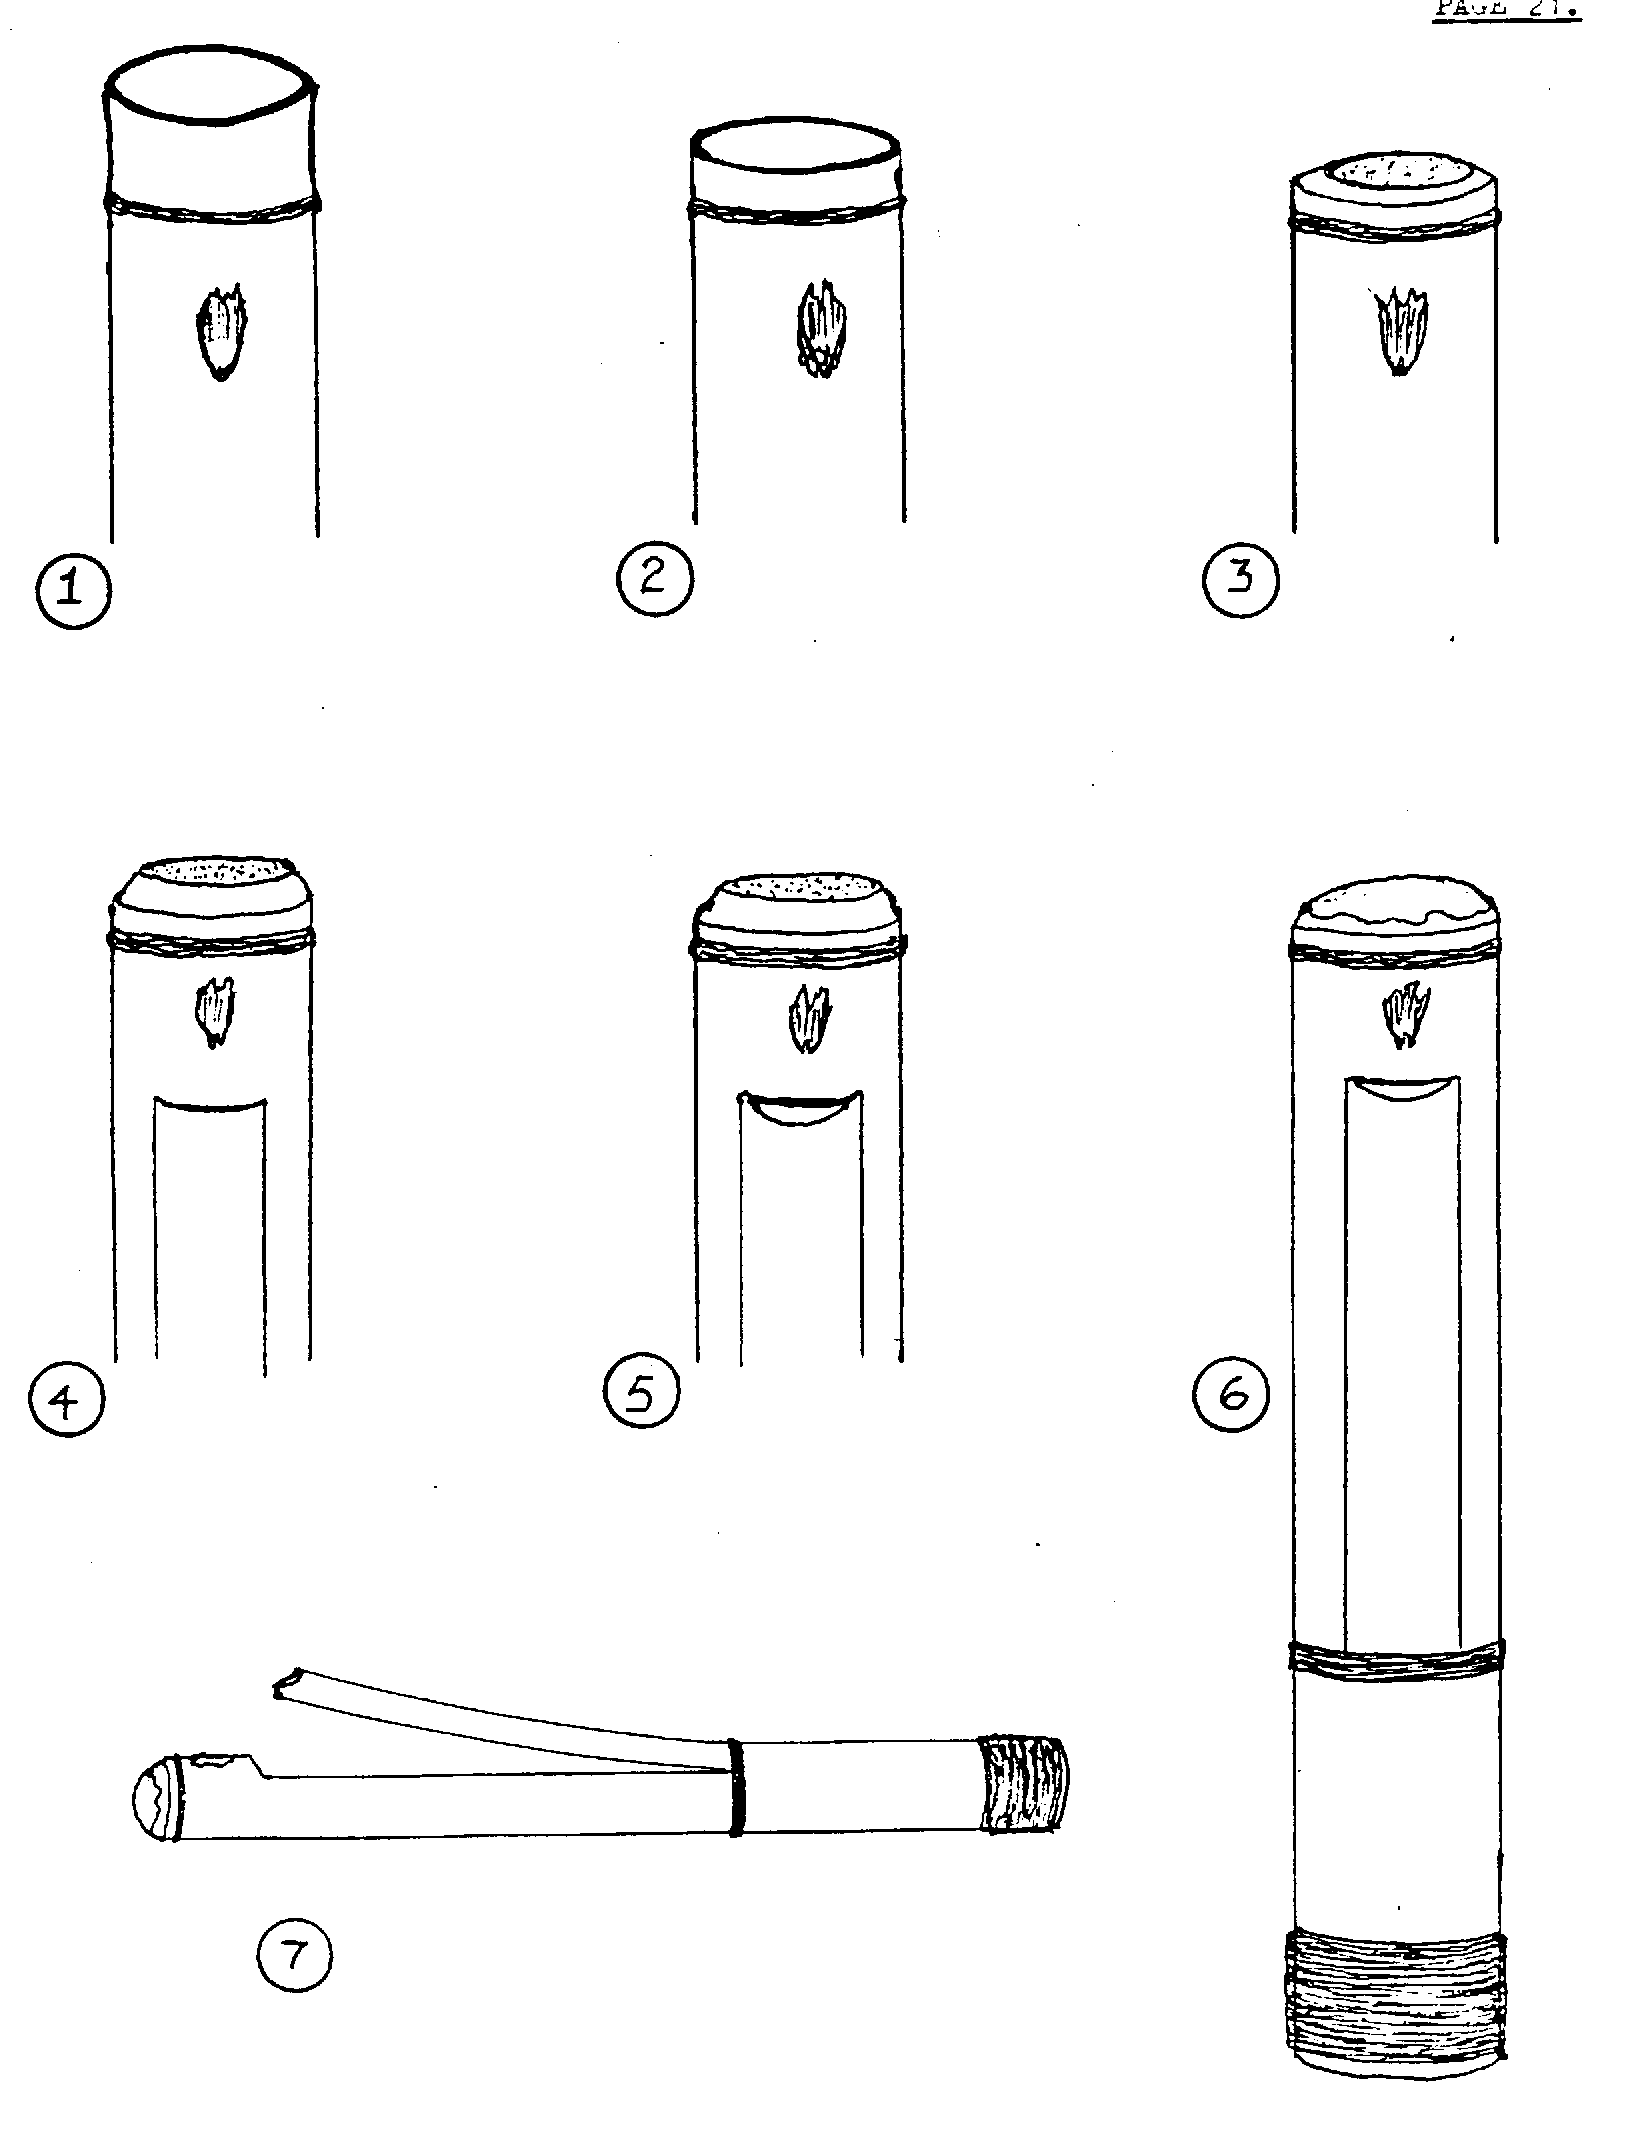
Diagram Index
- The raw cane selected should be straight and inspected for disease, splits, and other flaws.
- The cane will have a "coronet" near the knuckle end and this should be removed to within 1/16" of the dark brown line.
- Using a hand held pencil sharpener, remove the sharp edge above the knuckle end only enough to produce a slight chamfer.
- The bridle should now be placed on and the tongue split starting at a point 1/4" below the cane "pip". The depth of the cut will vary dependent on the diameter of the cane used but generally this is about 3/32". A good tip is to look directly down on the cut made so far and ascertain if 25% of cane is showing on each side of the cut. If so, this is far enough.
- Using a sharp knife or chisel, make a small nick at 45 degrees angle toward the cut. This nick should be about 1/16" wide and about half the depth of the cut. The nick should not be allowed to intrude beyond the edges of the tongue.
- Clean out the internal areas of the tongue as previously described. Take extreme care that the edges of the tongue and the tongue bed are not disturbed Or! broken in any way. If the cleaning has been properly carried out, the line of the tongue should be barely visible when held closed. Any break in the line indicates damage and possible leaking of the reed. 7. The final steps to the completion of the reed is application of the wax to the closed end and the wrapping of hemp on the open end. These are fully described elsewhere.
- As is the case with all reeds, they require special and delicate handling. When the reeds are completed and to be stored for a while, they should be placed in a box or jar and away from any drying elements.

|