|
Introduction Pipe Chanter Reeds
- What you require
- Shaping the Chanter Reed
- Cane Gouge
- Reed Blade Former
- Reed Staple Cutter
- Chanter Reed Staple Roller
- Chanter Reed Staple Former
- Chanter Reed Assembly Jig
Drone Reeds
- What you require
- Making the Drone Reed
- Diagram Index
- Drone Reed Jig
|
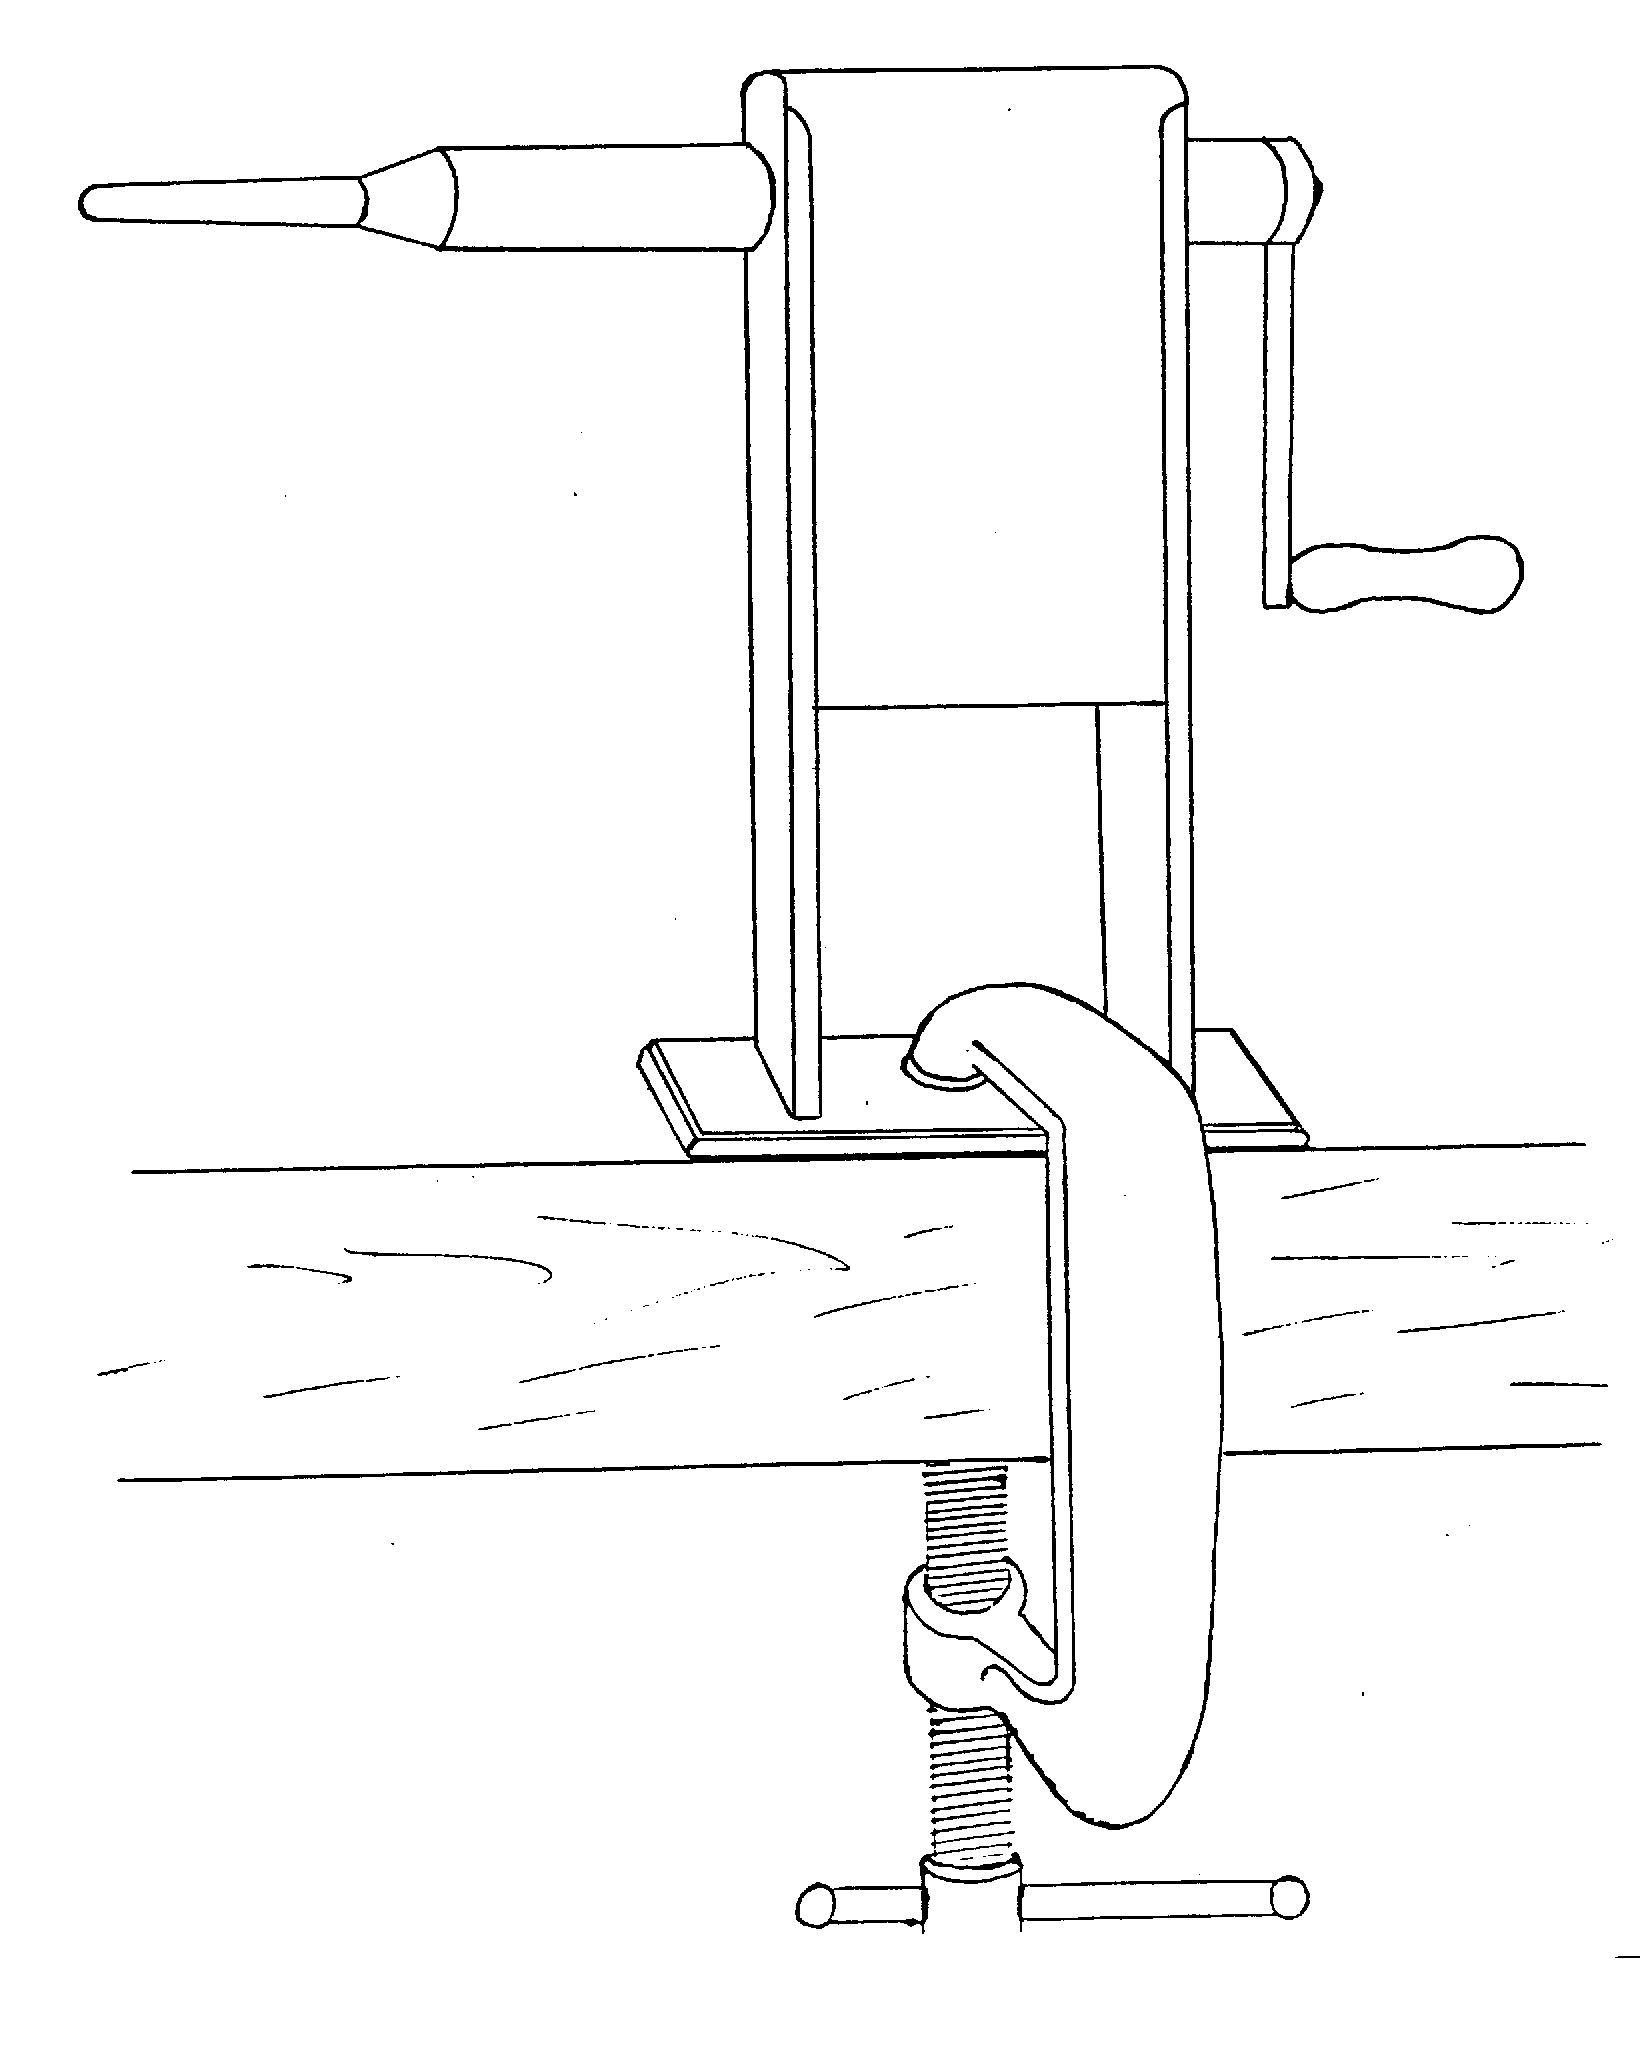
Chanter Reed Assembly Jig
Purpose: To enable ease of wrapping the reed blades to the staple
- This jig is available from a number of large music stores and will be readily recognized as that used for making most wind instrument reeds.
- The main advantage of this tool is that the internal gears continue to turn the shaft mandrel after the operator lets go and allows both hands free to complete the last few turns of wrapping the reed.
- It is necessary that the cane be held to the staple in the required position by wrapping a short length of hemp or thread around the blades of the reed at the widest point. There should be just enough pressure on the blades to pinch the staple to allow wrapping on the assembly jig. Obviously, this temporary thread will be removed subsequent to the final wrapping.
- The wrapping should be started with a double strand about an 1/8" from the open end of the staple and progressively cover the cane with tight and close turn until the required distance is reached. It is this process that permits the soaked cane to form around the staple as you progress and, when dry, retains this shape. Having reached the last turn of the wrapping, the double thread is then brought down to the open end of the staple in a series of long turns to give the appearance of a large screw thread. The ends are then tied off at the same spot that the wrapping was started.
- The wrapped reed should be allowed to dry at room temperature. The best way to achieve this is to have a block of wood with a number of panel nails embedded and place the staple end of the reed over the nail as they are completed.
- When the reeds are dry, thoroughly wet the entire wrapped area of the reed with a heavy lacquer. It is best to use the old fashioned cabinet makers type but this is not always available. DO NOT USE the spray can type as this has a tendency to over-spray and thereby have an affect on the performance of the reed.
After the lacquer application, replace the reed back on the nail to dry as in 5 above.
Finally wrap a few turns of white or yellow hemp to the end of the staple to ensure an air tight fit into the chanter.
GOOD LUCK!
|