|
Introduction Pipe Chanter Reeds
- What you require
- Shaping the Chanter Reed
- Cane Gouge
- Reed Blade Former
- Reed Staple Cutter
- Chanter Reed Staple Roller
- Chanter Reed Staple Former
- Chanter Reed Assembly Jig
Drone Reeds
- What you require
- Making the Drone Reed
- Diagram Index
- Drone Reed Jig
|
Reed Blade Former
Purpose: Final forming of reed blades.
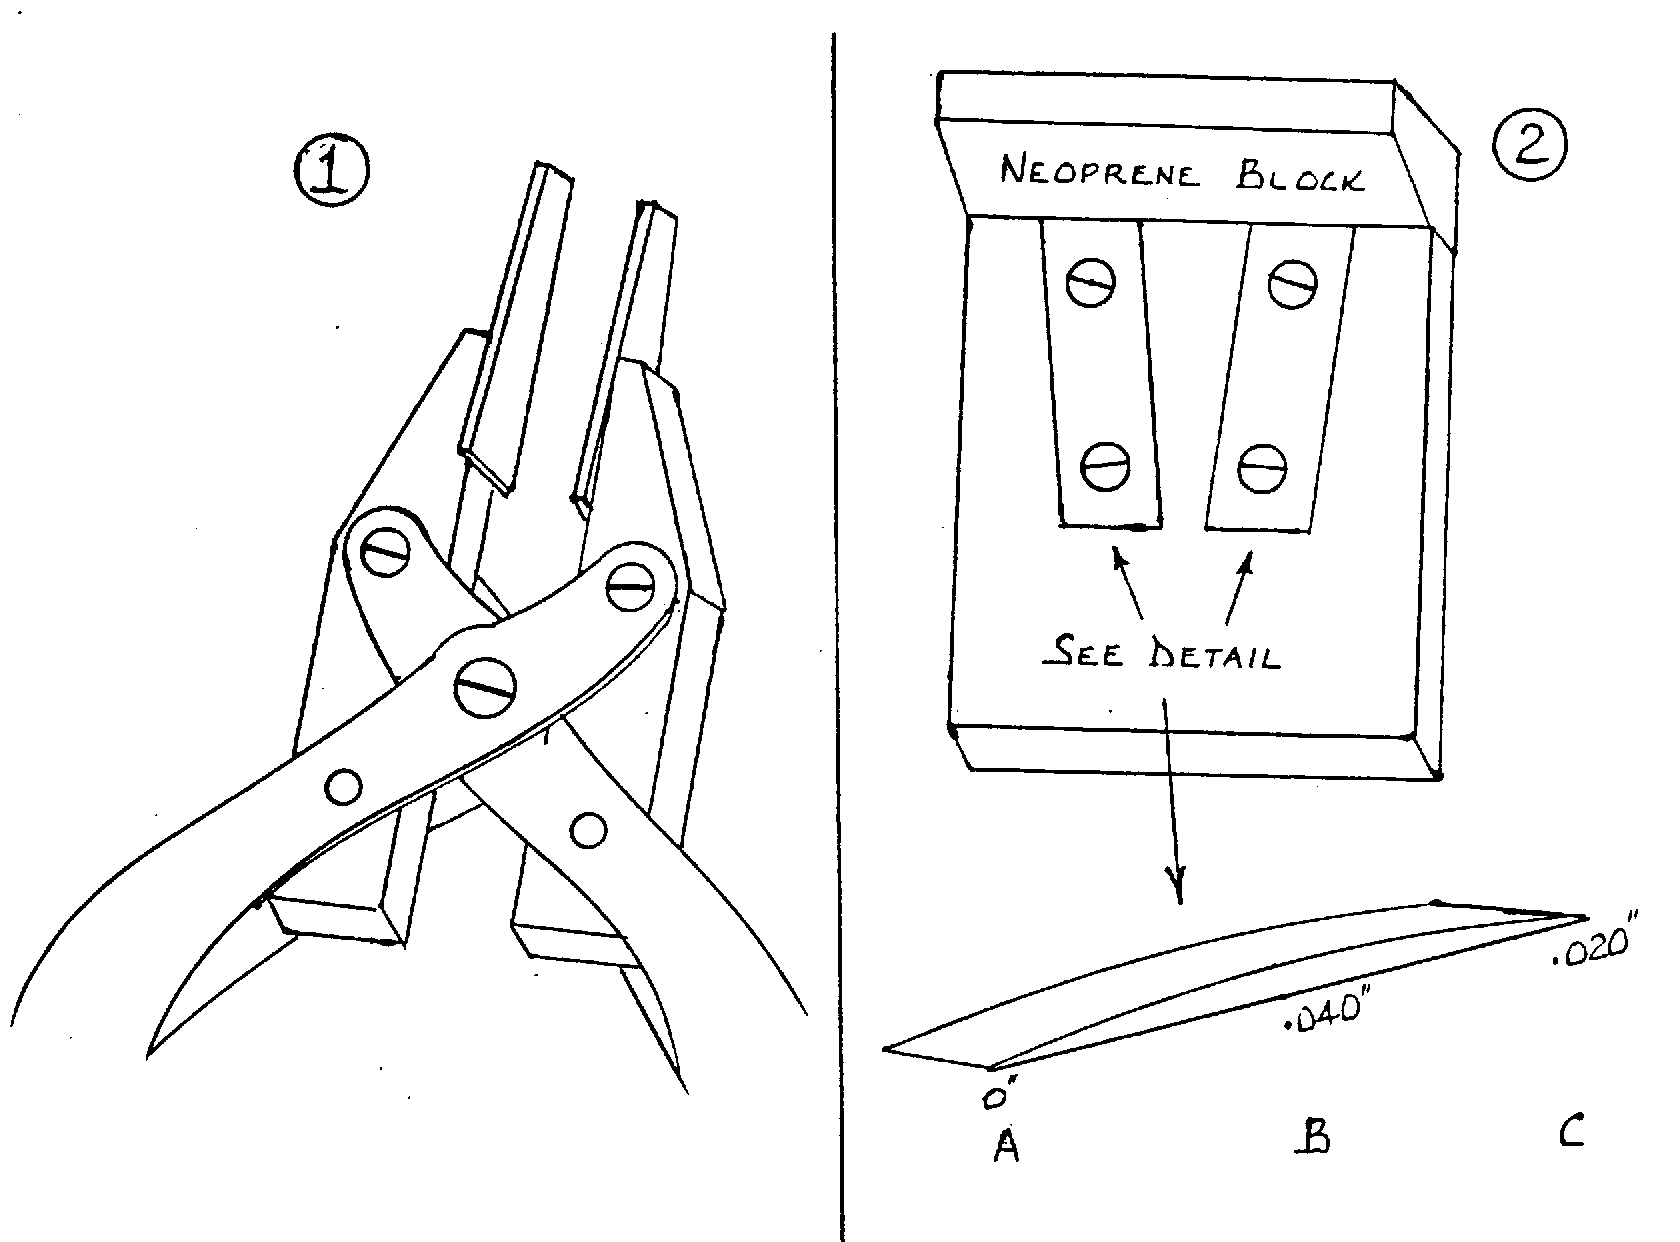
- The parallel jaw pliers shown are the type required to do the job in the proper manner. The jaws open to the extent of 5/8" and should permit the shaping of three pairs of blades at one time (i.e. 3 reeds). It is very important that the reed blades are centered in the jaws of the pliers so that equal amounts of surplus cane is exposed on each edge of the forms.
- The forms shown are made out of tool steel and should be ground convex and concave respectively to follow the contours of the previously gouged cane. These ground surfaces are probably not essential but it does lessen the risk of the cane blades splitting if too much pressure is applied to the pliers.
- Taking a sharp chisel or knife, the surplus cane should be shaved a little at a time from one side of reed blades until the cutting implement reaches the metal blade forms.
Keeping a firm grip on the pliers, a twist of the wrist will expose the surplus material on the opposite side and remove that surplus cane in the same manner.
- The block in diagram 2 shows two shaped strips of metal that have been ground to the final dimensions of the finished reed blade. Remembering to keep reed blades in their respective pairs, place a blade into the shaving block and gently remove all the surplus material with a sharp chisel until the tool slips easily along the faces of the metal strips.
- Having accomplished all of the above, you should now have a pair of reed blades ready for soaking and wrapping to the staple.

|